
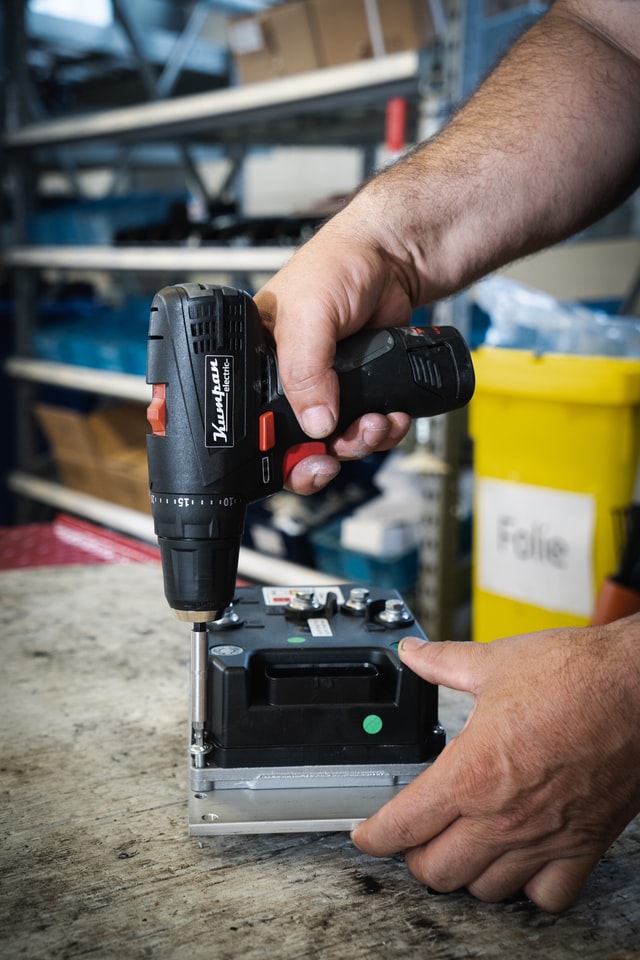
One important DIY tool you must have is a power drill. Equipped with speed and torque, a power drill can bore holes, tighten fasteners, and even mix paint. And with the hand-carry type of drill—the hand drill—you can have the power and accuracy of a regular drill in the palm of your hand!
However, with so much power on one tap, it’s no wonder that a drill might cause some hesitation among beginner DIY enthusiasts. If given the time to learn it, you’ll surely won’t turn back.
This guide explains the differences between types of drills, how to use a power drill, and a few safety tips.
Important Hand Drill Parts
The first step to learning how to use a power drill is becoming familiar with the tool’s different parts. Like most power tools, drills comprise several key components:
- Drill bits
- Chuck
- Trigger
- Motor
- Grip
- Torque adjuster
- Reverse switch
- Cord or battery
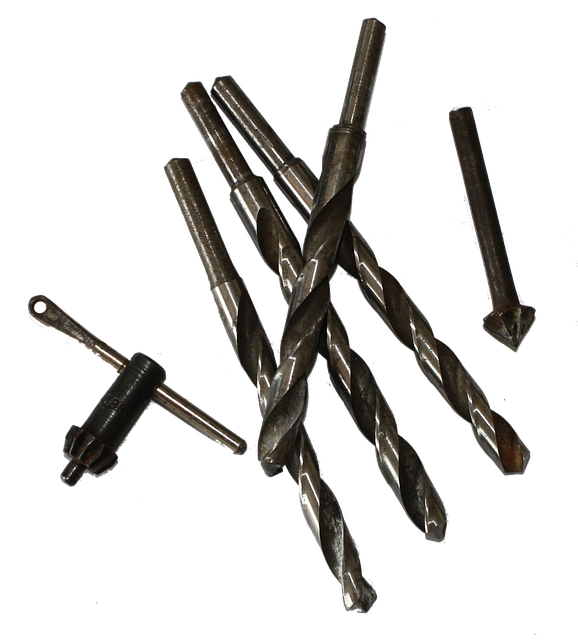
Drill bits: Drill bits are cutting tools with a spiral design used to create cylindrical holes. This determines the size of the hole and is attached/removed when needed.
Chuck: The part of the drill that clamps down on the drill bit. Older drills often require a “key” wrench to open or close the chuck. However, you can buy modern hand drills that feature keyless chucks.
Trigger: The trigger is the power switch used to activate the drill’s motor. Majority of hand drills feature pressure-sensitive triggers, so light pressure will activate a slow speed, while heavy pressure will produce a faster speed.
Motor: Found at the top of most drills, the motor is the part that actually spins the chuck and drill bits. Rotational speed depends on pressure given to the trigger.
Grip: The place where the user holds the drill is often covered with rubber for an anti-slip surface and comfort.
Torque adjuster: The torque adjuster is the ring at the base of the chuck that allows the user to select the amount of torque the drill will exert. There is a clutch inside the drill that will slip at the predetermined value to prevent over-torquing.
Reverse switch: Most hand drills feature both clockwise and counterclockwise spin, and the user selects which direction by using the reverse switch.
Cord or battery: The hand drill is powered through a cord that’s connected to an outlet or it comes with a battery. Batteries for hand drills have their own charging station when it’s low on power.
3 Types of Hand Drills to Know
Power drills have been available for several decades. In fact, the first power drill patent is over 130 years old. Over time, drill designs continued to improve and today’s models come in three major designs:
1. Corded Drill
This hand drill features an electrical cord that plugs into an outlet to power the motor. Often, corded drills are heavy-duty and produce a significant amount of torque, but lack some of the refinement of cordless drills. The cord tethers the user, but not having to worry about a time limit use is a good trade-off.
2. Cordless Drill
Cordless drills use detachable, rechargeable batteries that allow you the freedom to take a drill anywhere. They come with more weight and less torque, but features keyless chucks, LED work lights, belt clips, and more. Initially, cordless drills were slow, underpowered, and featured poor battery life, but today’s models are the opposite—fast, strong, and long-lasting.
3. Right-Angle Drill
While corded and cordless drills look similar, right-angle drills are visually unique. These drills feature long handles that attach to the bottom of the motor to save space, allowing for positioning in tight spots where a traditional drill won’t fit.
Initial Setup and Calibration
Drills come more or less ready to use directly out of the box. After charging and installing the battery of a cordless drill or plugging in a corded drill, the right drill bit for the job at hand should be inserted into the chuck. Learning how to put a drill bit in a drill is fairly straightforward.
- Choose the correct drill bit for the fastener size.
- Switch the drill into “reverse” mode so the chuck spins counterclockwise.
- Hold on to the chuck’s grip while the motor is spinning to loosen the chuck and open its jaws.
- Put the drill bit inside the chuck, switch the direction back clockwise, hold the chuck, and squeeze the trigger until it tightens down on the bit.
How to Use a Drill for Drilling a Hole
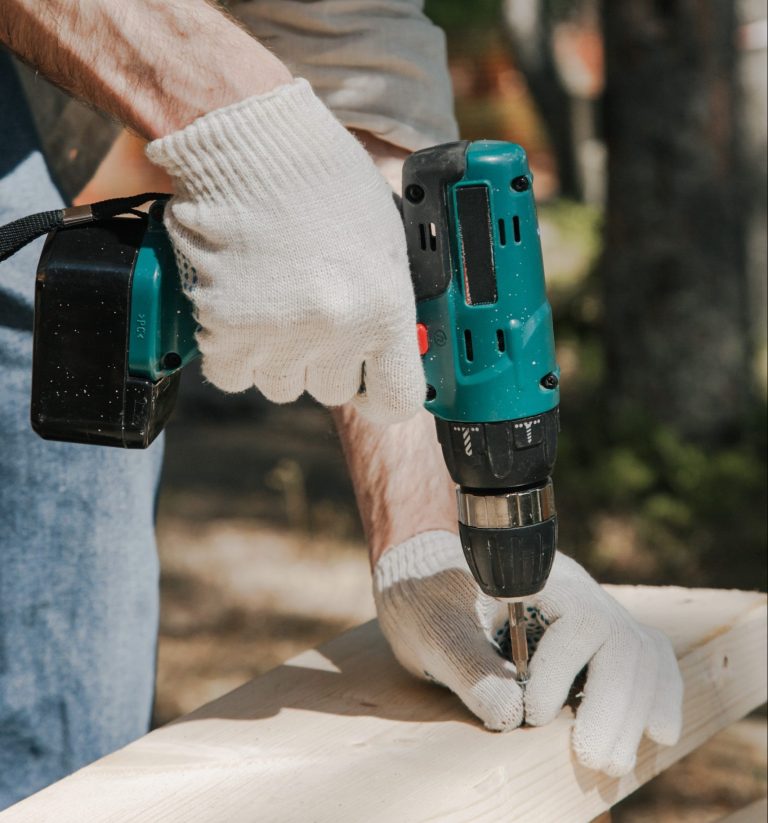
The drill’s main purpose is to drill holes in materials like wood and metal. The process isn’t difficult but should be done right to prevent injuries. Follow these steps below to know how to do it right:
STEP 1: Install The Correct Drill Bit.
Choose the correct drill bit size. If there aren’t explicit instructions for your project, it’s possible to match the bit by eye. When drilling a pilot hole, visually match the diameter of the bit with the shaft (not the threads) of the screw that will go in the hole.
Once chosen, install the bit in the chuck. Set the direction to reverse, lightly squeeze the trigger, and hold on to the chuck until it opens far enough to receive the bit. Place the bit inside the chuck, switch the direction to forward, and hold the chuck while lightly squeezing the trigger.
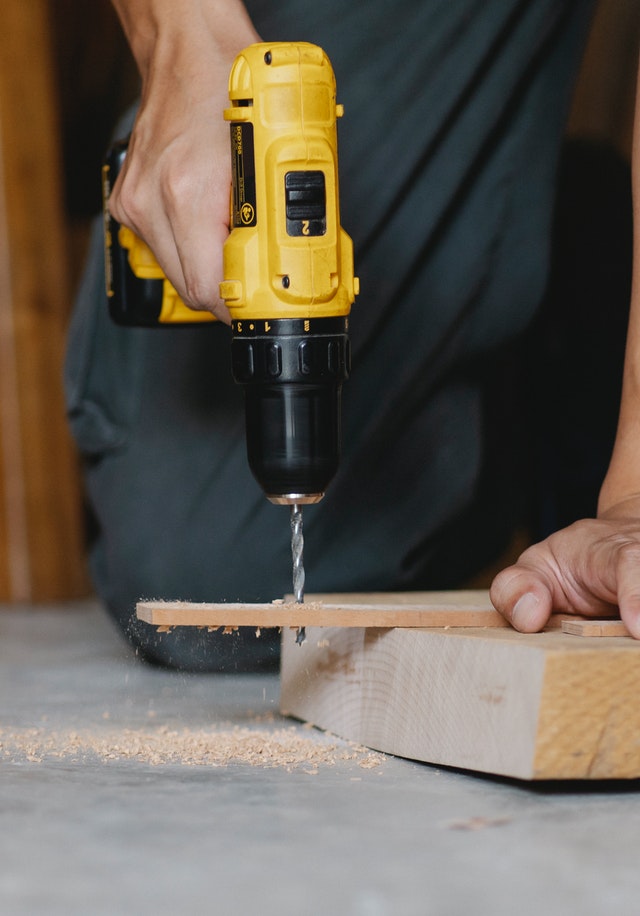
STEP 2: Place The Tip Of The Drill Bit On The Mark.
Using light pressure, place the tip of the drill bit on the mark where the hole will be. Hold the drill so the drill bit is as perpendicular as possible to the target surface.
If the drill is aimed at an angle when drilling, the bit will start to “walk” while spinning, meaning it will move away from the mark and result in an inaccurate hole. It can help to place the free hand on the back of the drill to steady it at the correct angle.
STEP 3: Lightly Squeeze The Trigger.
Switch the drill back to forward mode so the chuck spins clockwise. Applying light pressure to the trigger, start the bit slowly until it digs into the surface. If it begins to walk, stop, release the trigger, replace the tip of the bit on the original mark, and start the process again.
Starting slowly helps drill an accurate hole, while squeezing the trigger too quickly and starting at full speed could cause the bit to walk.
STEP 4: Drill All The Way Through The Surface.
Once the bit is started, escalate the speed by squeezing the trigger. While the bit is spinning, apply light forward pressure on the drill to help the bit dig into the surface. Be sure to keep the drill bit perpendicular to the drill straight. As the bit is close to drilling all the way through, release the pressure and slow the bit to prevent jamming the chuck into the workpiece.
When drilling through metal, press the trigger in short bursts. Metal requires slow drilling in order to manage heat and prevent the bit from dulling.

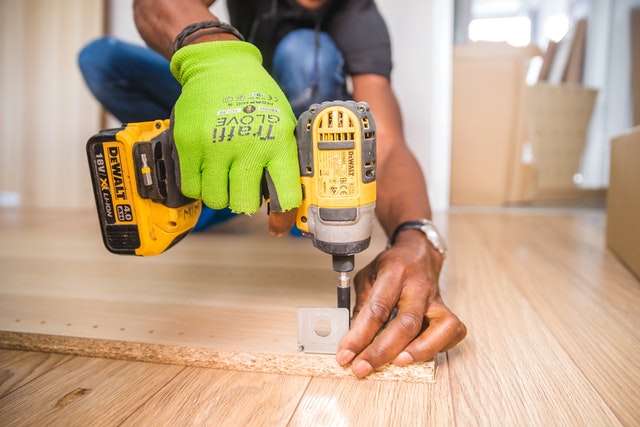
How to Use a Drill for Driving Screws
Tightening or loosening screws with a screwdriver takes a long time, and it can be quite a workout, depending on the material and fastener. Knowing how to use a drill for screws speeds up the process tenfold.
STEP 1: Match the driver bit to the fastener head.
Screws are not universal, so it’s important to match the fastener head with the right driver bit. This could be various sizes of Phillips, straight or regular blade, square, Torx, star, and several other bits.
Once chosen, loosen the chuck by switching the direction to reverse. Hold the chuck and apply light pressure to the trigger to open the chuck wide enough to receive the bit. Switch the direction to forward, hold the chuck, apply light pressure to the trigger, and tighten down on the driver bit.
STEP 2: Seat the bit into the fastener.
Carefully position, the driver bit into the head of the fastener so that it fit snugly. Hold the drill so it is aligned with the fastener. If the drill isn’t in line, or if the bit isn’t fully seated, the bit can damage the head of the screw and make it impossible to drive. Also, holding the drill askew can cause the fastener to slip and the drill can fall off the head.
STEP 3: Squeeze the trigger and apply forward pressure.
With the bit seated in the fastener and the drill inline with the fastener, apply light pressure to the trigger to start the screw. A bit of forward pressure may also be necessary, as dense materials will resist the screw. Be sure to keep the drill aligned with the fastener.
As the screw digs into the surface, squeeze the trigger to increase the speed, and apply more forward pressure. If the bit skips, reposition the drill so it is straight. Continue until the head of the screw reaches the desired depth.
Conclusion
Hand drills are great tools, and they can transform otherwise long, arduous, and mistake-prone jobs into quick work. From drilling holes to drive screws, all it takes is a bit of confidence and willingness to try a new tool. If you plan on trying DIY home projects, investing in a good hand drill and learning how to drill safely will go a long way in finishing a project.